How to Create a Notification Alert
Camila Escobar · June 17, 2026
Learn how to create a notification alert in Praxsuite step by step. This guide explains how to open Notifications, create a rule, choose an event topic, assign recipients, and automatically notify users about workspace activity.
Notification alerts in Praxsuite allow you to define workspace rules so selected users are notified when specific events happen.
This is useful when you want people to be informed automatically about activity such as row changes, table changes, form events, status updates, or user activity.
This guide explains how to create a notification rule step by step.
Step 1: Open the app launcher
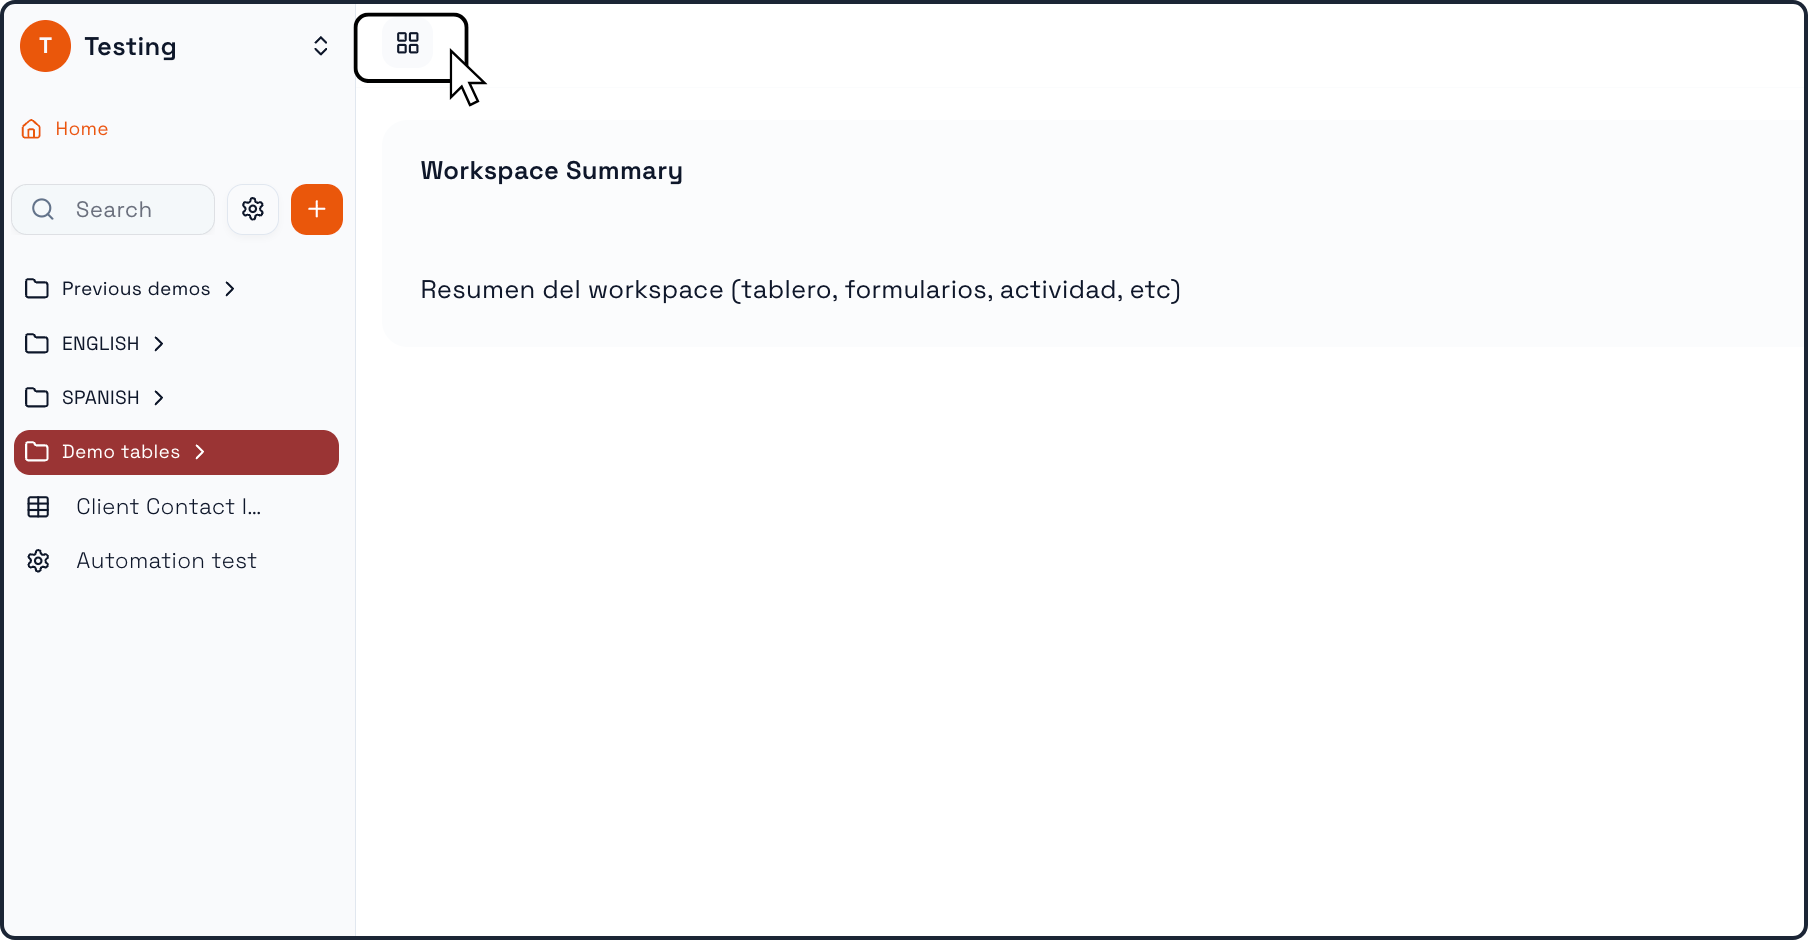
From the main Workspace view, click the grid icon near the top-left area of the screen.
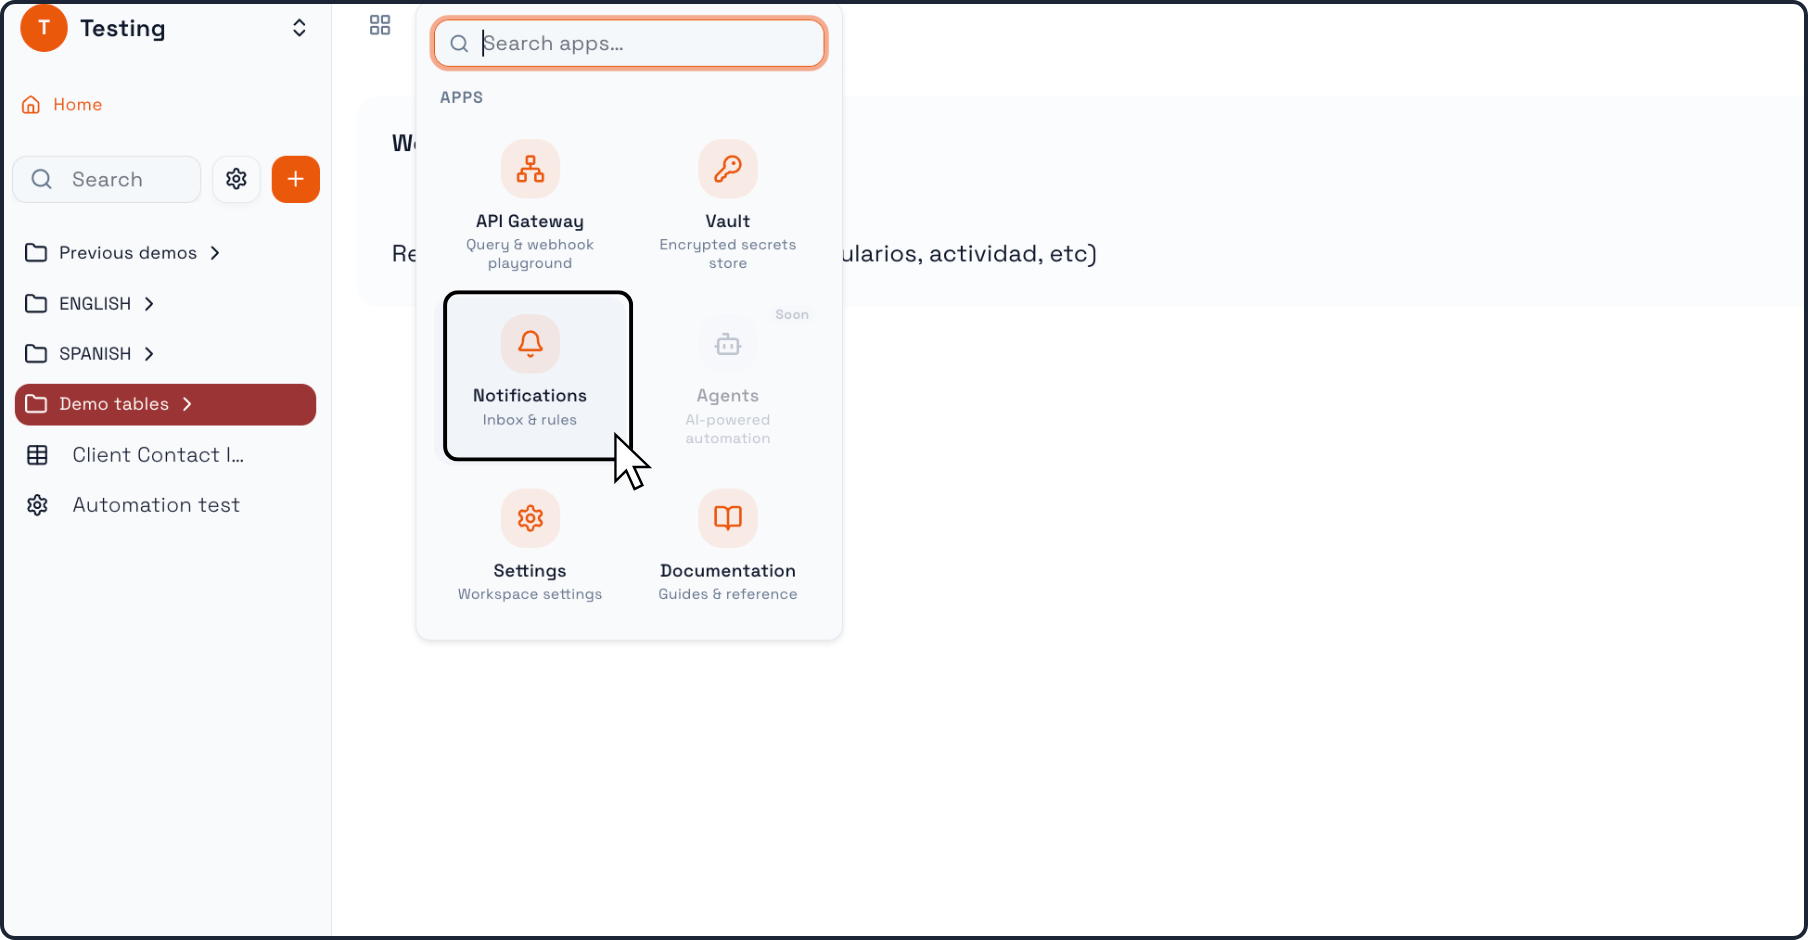
This opens the app launcher, where you can access different workspace tools such as:
API Gateway
Vault
Notifications
Settings
Documentation
Step 2: Open Notifications
Inside the app launcher, click Notifications.
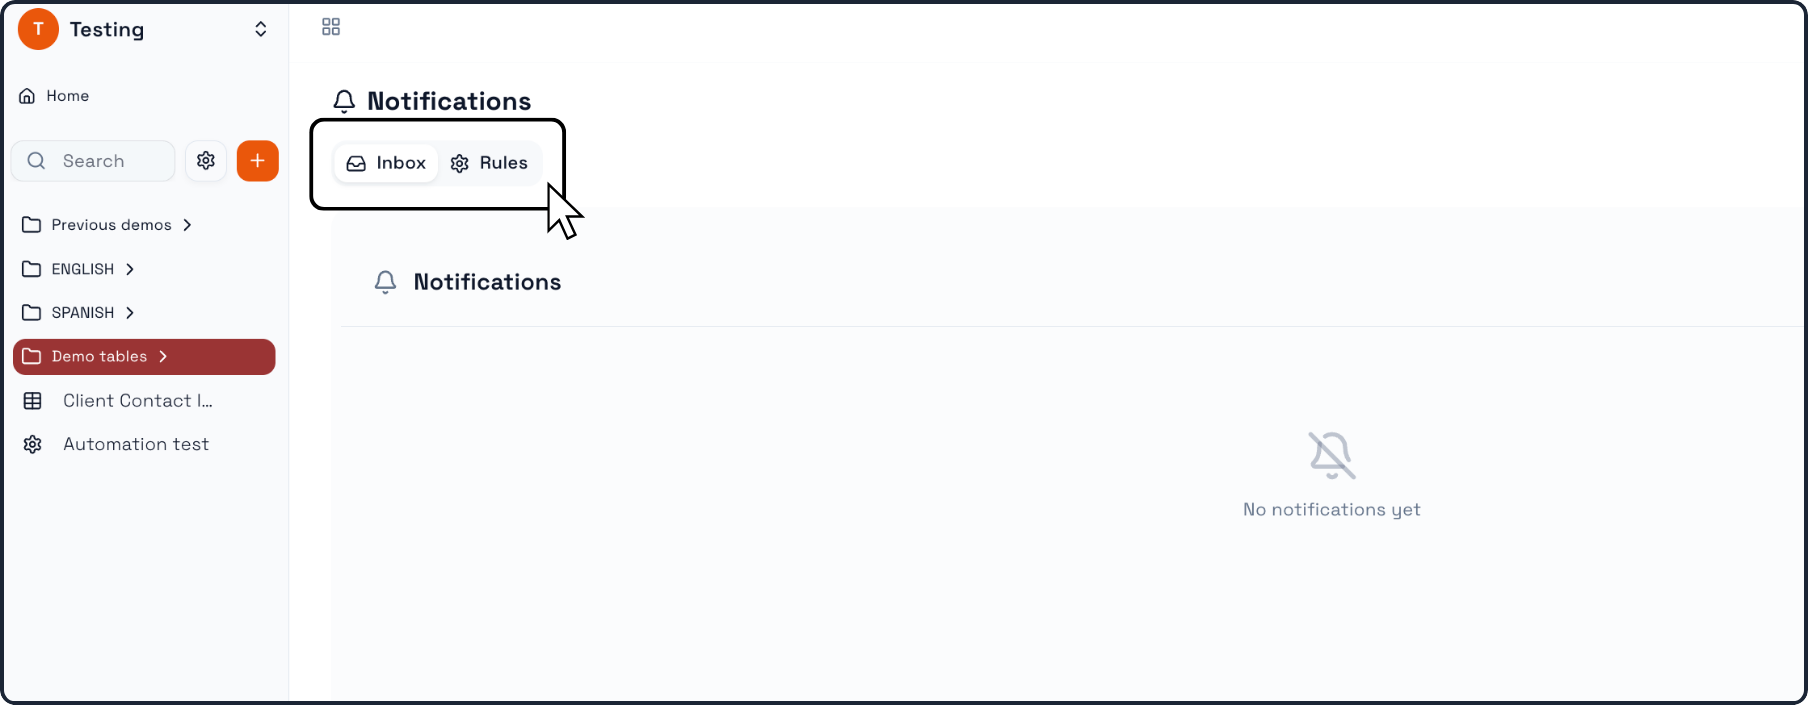
This takes you to the Notifications area of Praxsuite.
Here, you will find two main sections:
Inbox
Rules
To create an alert, go to Rules.
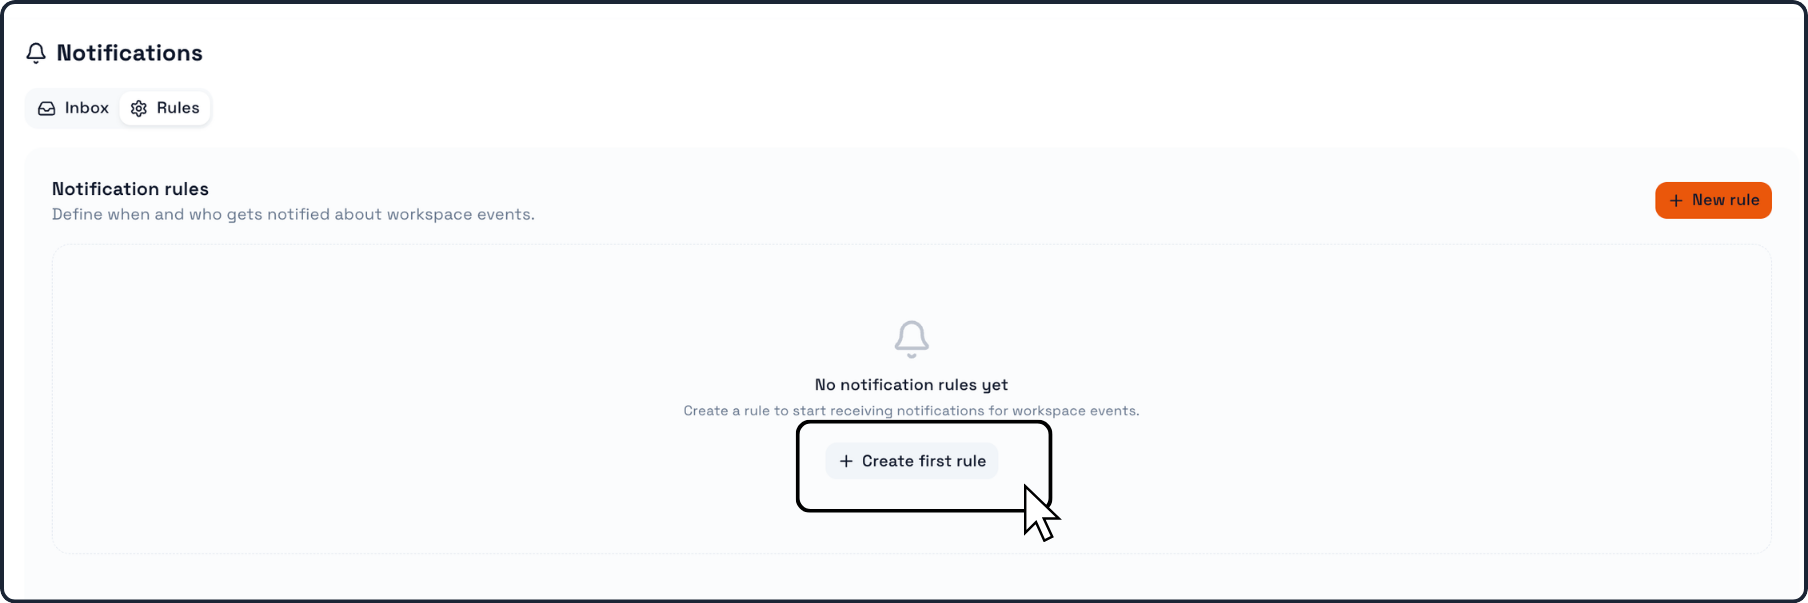
Step 3: Open the Rules tab
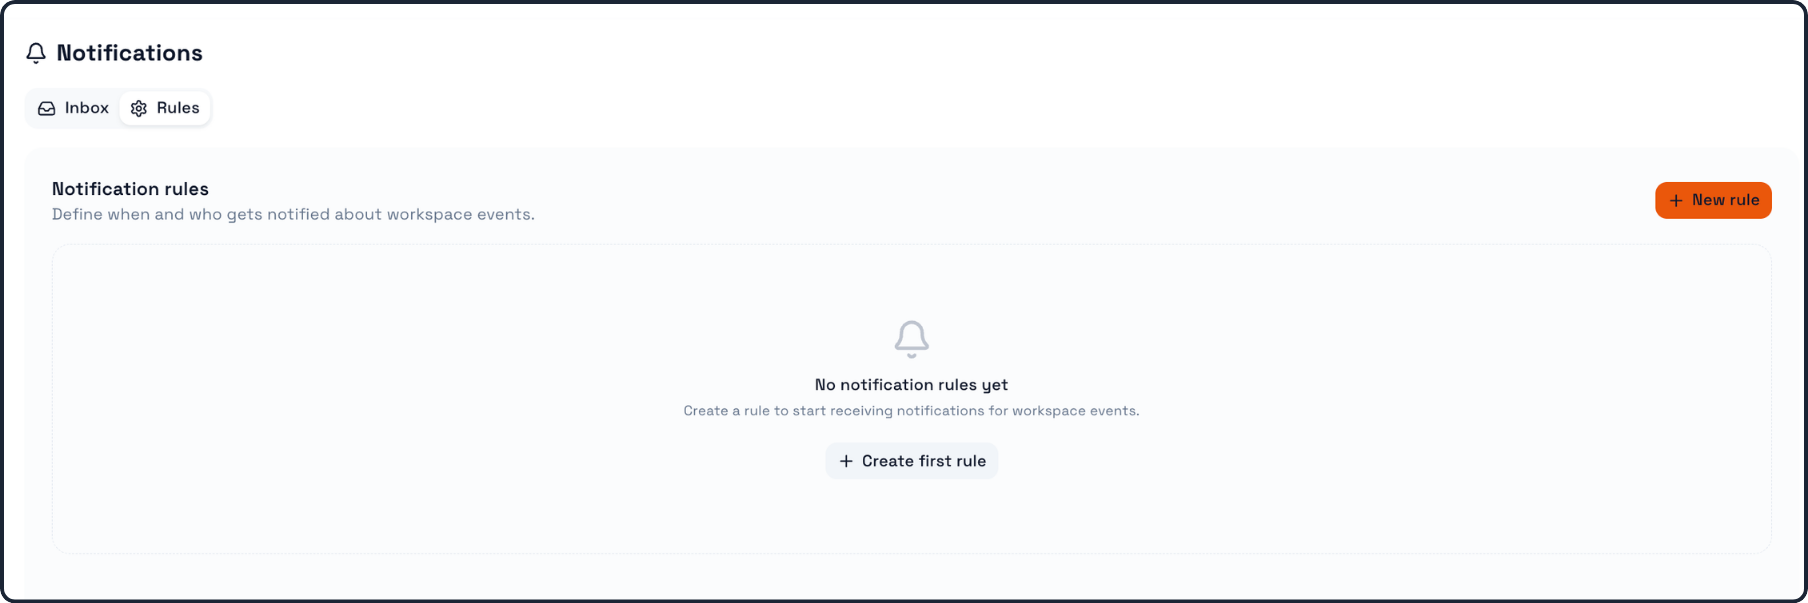
Inside Notifications, click Rules.
This section is where Praxsuite lets you define notification rules, meaning when notifications should be triggered and who should receive them.
If no rules have been created yet, the page will show an empty state with options such as:
Create first rule
New rule
Step 4: Click New rule
Click New rule.
This opens the New notification rule window.
Here is where you configure the alert rule.
Step 5: Enter the rule name
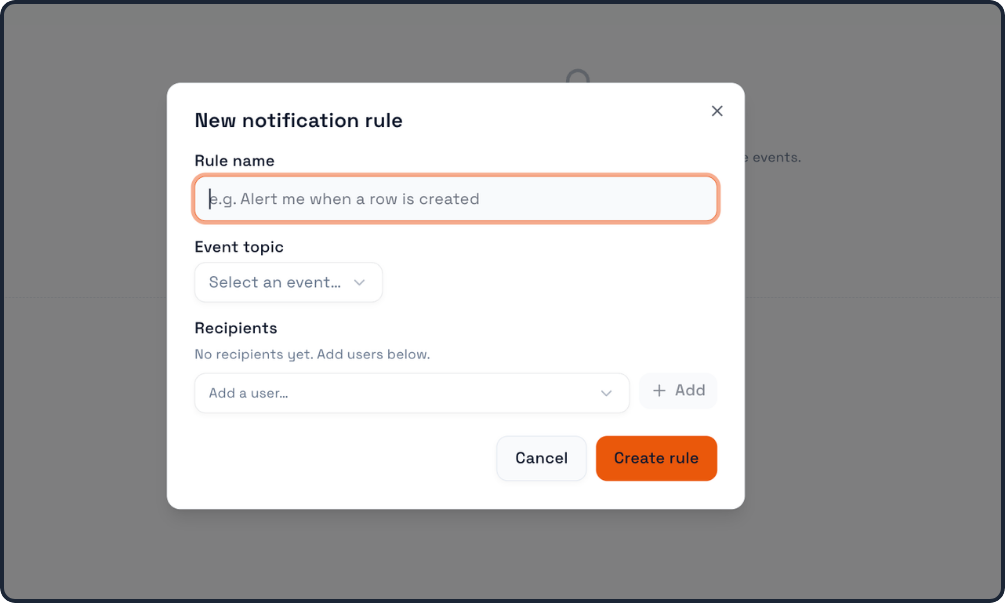
In the Rule name field, type the name of your notification rule.
The name should describe what the alert is meant to monitor.
Examples:
Alert me when a row is created
Notify team when a form is submitted
Table update alert
Status change notification
This makes it easier to identify the rule later.
Step 6: Select the event topic
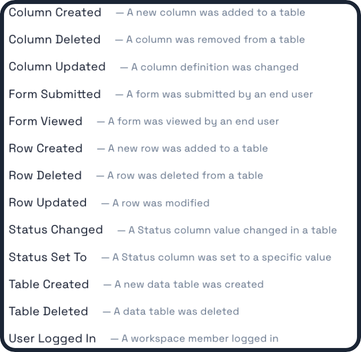
In the Event topic field, choose the event that should trigger the notification.
The available options are:
Column Created
Column Deleted
Column Updated
Form Submitted
Form Viewed
Row Created
Row Deleted
Row Updated
Status Changed
Status Set To
Table Created
Table Deleted
User Logged In
Each event topic defines the type of activity Praxsuite will watch.
Step 7: Select a specific table if needed
Some event types allow you to narrow the rule to a specific table.
In the Specific table (optional) field, you can choose:
a specific table
or leave it as Any table
If you leave it as Any table, the rule can trigger across all tables in the workspace that match the selected event type.
Use a specific table when the alert should apply only to one operational area.
Step 8: Add recipients
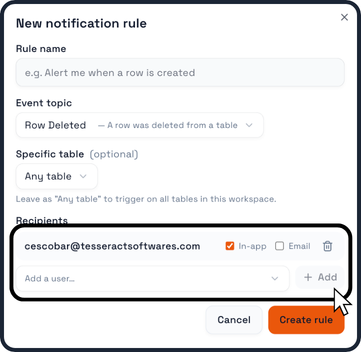
In the Recipients section, choose which user should receive the notification.
Use the recipient selector to pick a user, then click Add.
You can repeat this process to add more recipients if needed.
This allows the rule to notify the right people automatically when the event occurs.
Here, you can also select which way you will recieve notifications, by Email or In-App.
Step 9: Create the rule
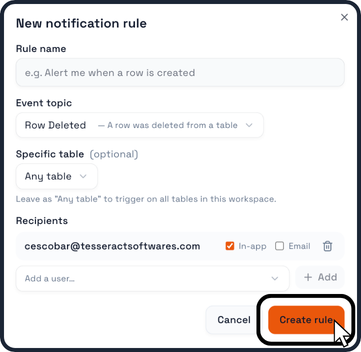
Once the rule name, event topic, optional table filter, and recipients are ready, click Create rule.
Praxsuite will save the notification rule and add it to the Rules section.
From that point on, the workspace will monitor the selected event and notify the configured recipients when the rule conditions are met.
Key things to remember
Notification alerts are created from Notifications > Rules
Each rule needs:
a Rule name
an Event topic
at least one recipient
Some rules can also be limited to a specific table
The Inbox is where users review triggered notifications
Notification rules help teams stay informed automatically about workspace activity