
Trigger Nodes
Camila Escobar · June 17, 2026
A trigger is how an automation starts. Every automation has exactly one, and the choice decides two things: when the flow runs, and what it has to work with when it does.
There are five.
Manual
Runs on demand — from the builder while you are testing, from the API, or from another automation's Call Automation node.
Its context starts empty apart from whatever the caller passed in. That makes it the natural choice for a job somebody decides to run: a monthly export, a data fix, a re-send.
It is also how you test the rest. Build the flow with a manual trigger, get it right, then swap in the real one.
Schedule
Fires on a recurring schedule or interval, in the workspace timezone — not UTC, which matters the moment "every day at 9" needs to mean nine o'clock where your team is.
Use it for the work nobody should have to remember: nightly syncs, reminder emails, a weekly digest, expiring old records.
The thing to design for is overlap. If a scheduled run can take longer than the gap between runs, decide what should happen — usually by making the flow safe to run twice rather than by hoping it never happens.
System event
Fires on a workspace event: a row created, a row updated, a row changing status.
This is the trigger that makes Praxsuite feel alive. A row lands in Requests and the flow notifies someone; a status moves to Approved and the invoice goes out. Nobody calls anything — the data changing is the event.
Two things worth knowing before you rely on it:
Your own automation writing a row is also an event. A flow that updates the table it is triggered by can trigger itself. Filter on what changed, or write to a different table.
Status changes are their own event, distinct from a general update. If you only care about "moved to Approved", say so rather than reacting to every edit and checking afterwards.
Webhook
Fires when an inbound HTTP request hits this automation's URL. It accepts the request, answers immediately, and does the work afterwards.
That shape is exactly right for "another system is telling me something happened" — a payment provider posting an event, a form service forwarding a submission, a CI pipeline reporting a build. The sender wants a fast acknowledgement, not your business logic's opinion.
The request body arrives in the context, at {{context.request.body}}.
Endpoint
Fires the same way, and then holds the connection open until your flow produces a Response. The caller gets whatever your Response node says — status code, headers, body.
This is the one that turns an automation into an API. Your app calls it, waits, and uses the answer.
The platform enforces the pairing: an endpoint automation must have exactly one Response node, and an automation without an endpoint trigger may not have one at all.
Choosing between webhook and endpoint
They are the two that get confused, so:
| Webhook | Endpoint |
Answers | Immediately | When your flow decides |
Caller waits for the work | No | Yes |
Returns your data | No | Yes |
Right for | Notifications from other systems | Your own app asking a question |
If the caller does not care what your flow concluded, a webhook is better — it stays fast no matter how slow the work is. If the caller needs an answer, only an endpoint will do.
Next
Database nodes — reading and writing rows
Logic nodes — branching, loops, and the Response node
Server-side logic — building an API on the endpoint trigger
What it looks like
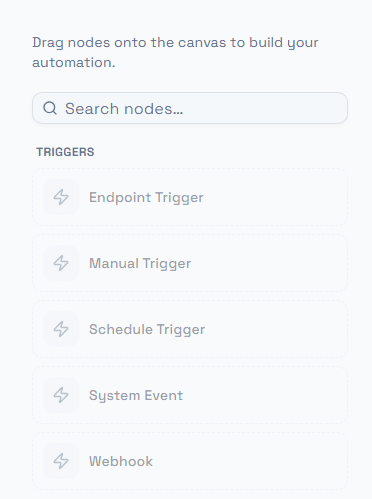
The palette on the left of the automation editor, filtered to Triggers. You drag one of these onto the canvas to start a graph.
The small badge on each node — 1 AU, 2 AU — is what one execution of that node costs against your plan's automation units. It is worth reading before you build a loop around a node: cost is per node run, not per automation.