How to Add a Formula Column in a Table
Camila Escobar · June 17, 2026
Learn how to add a Formula column to an existing Praxsuite table. This guide explains how to create the column, select the Formula data type, build the expression, preview the result, and calculate values automatically from existing table data.
Formula columns let you calculate values directly inside an existing Praxsuite table. This is useful when you want the system to generate results automatically based on other columns, instead of entering them manually.
This guide explains how to add a new column to an existing table and configure it as a Formula field.
Step 1: Open the table where you want to add the formula
Go to the existing table where the calculated value should be shown.
Formula columns are created directly inside the table where the data already exists. This means the formula can use the same records and columns that are already part of the table.
Step 2: Click Create Column
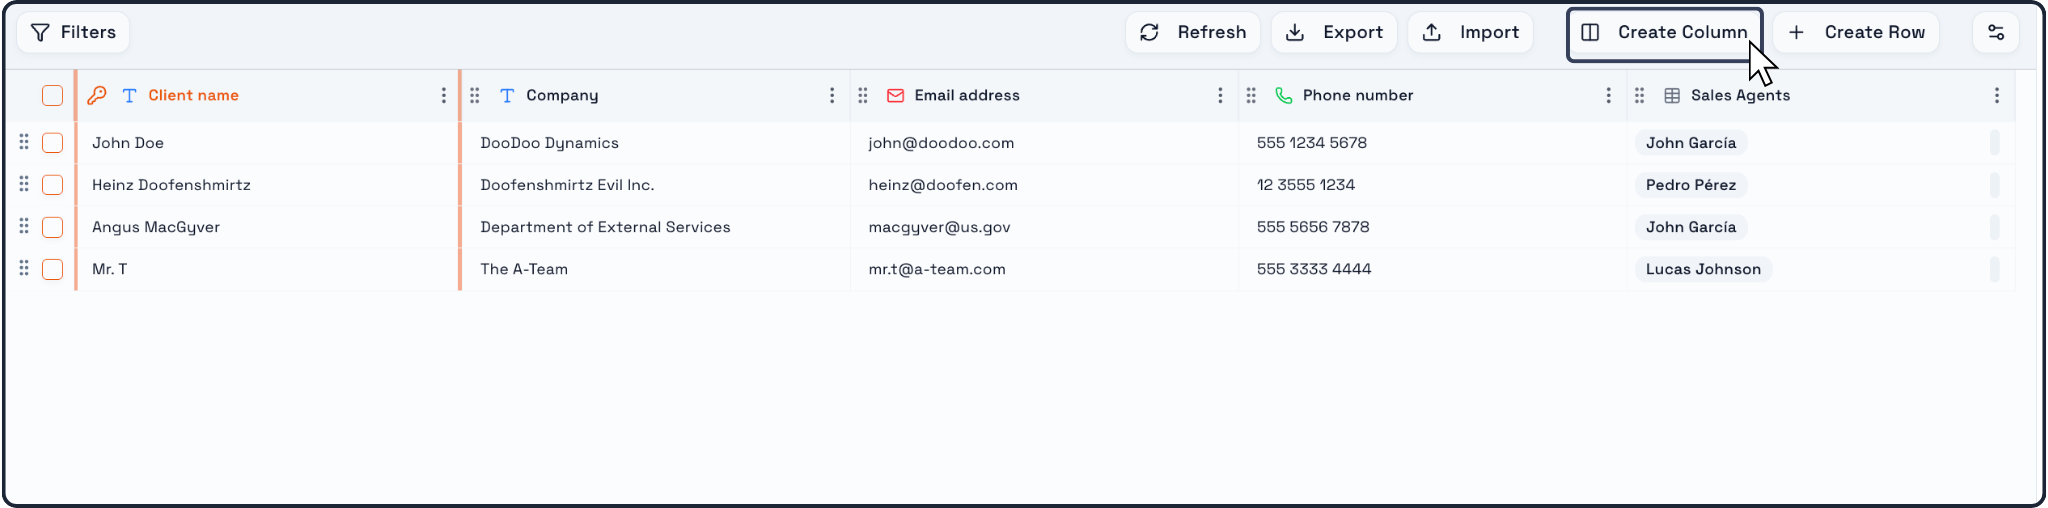
In the top toolbar of the table, click Create Column.
This opens the Create New Column window, where you define both:
the name of the column
the data type of the column
Step 3: Enter the column name
In the Column name field, type the name you want to use for the calculated result.
Examples:
Total Price
Margin
Discounted Total
Status Result
Revenue per Order
The name should describe the value that the formula will produce.
Step 4: Change the data type to Formula
In the Data type dropdown, open the list of available data types and select Formula.
Once Formula is selected, the column setup window expands to show the formula editor.
This is where you define the calculation logic.
Step 5: Write the formula
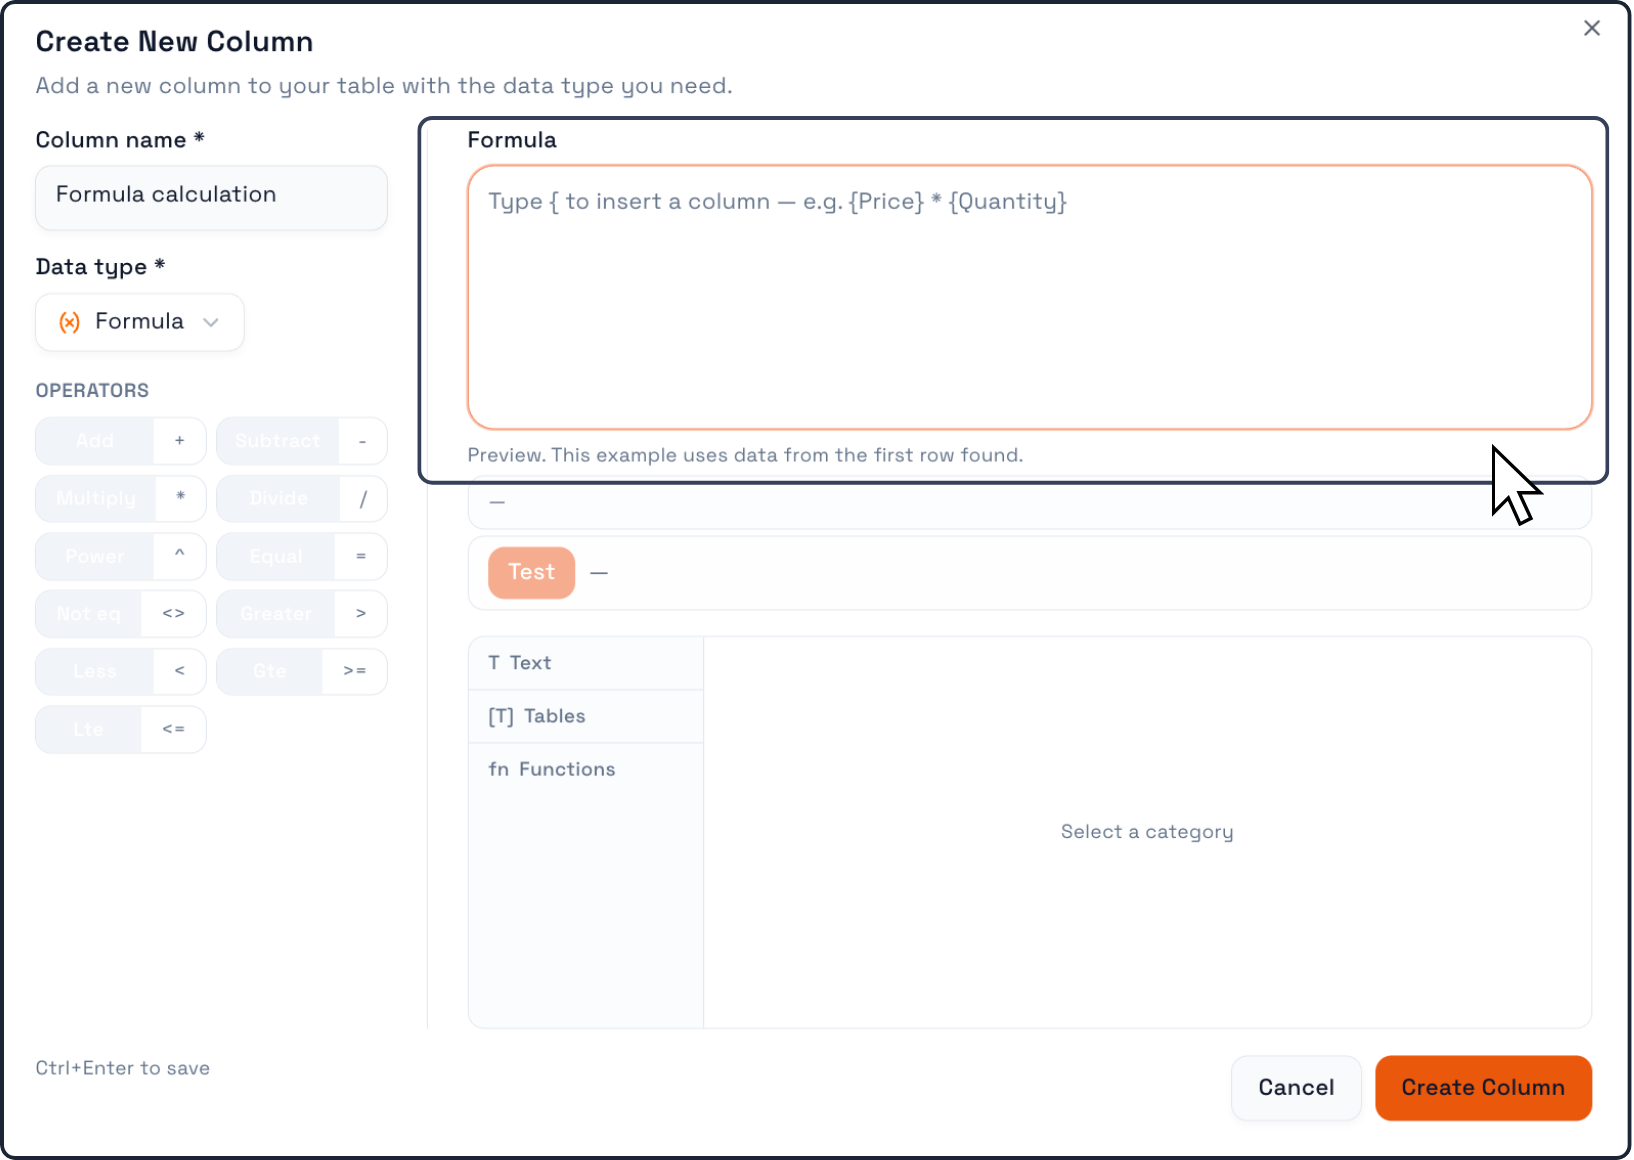
In the Formula field, type the expression you want Praxsuite to calculate.
The editor supports writing formulas by referencing other columns in the table.
The UI example shows this format:
{Price} * {Quantity}
This means the formula uses existing table columns as inputs and calculates a new value automatically.
Step 6: Use the formula builder tools
When Formula is selected, Praxsuite provides additional tools to help build the expression:
Operators

On the left side, you can use operators such as:
Add +
Subtract -
Multiply *
Divide /
Power ^
Equal =
Comparison operators like <>, >, <, >=, <=
These help create arithmetic and logical expressions.
Categories
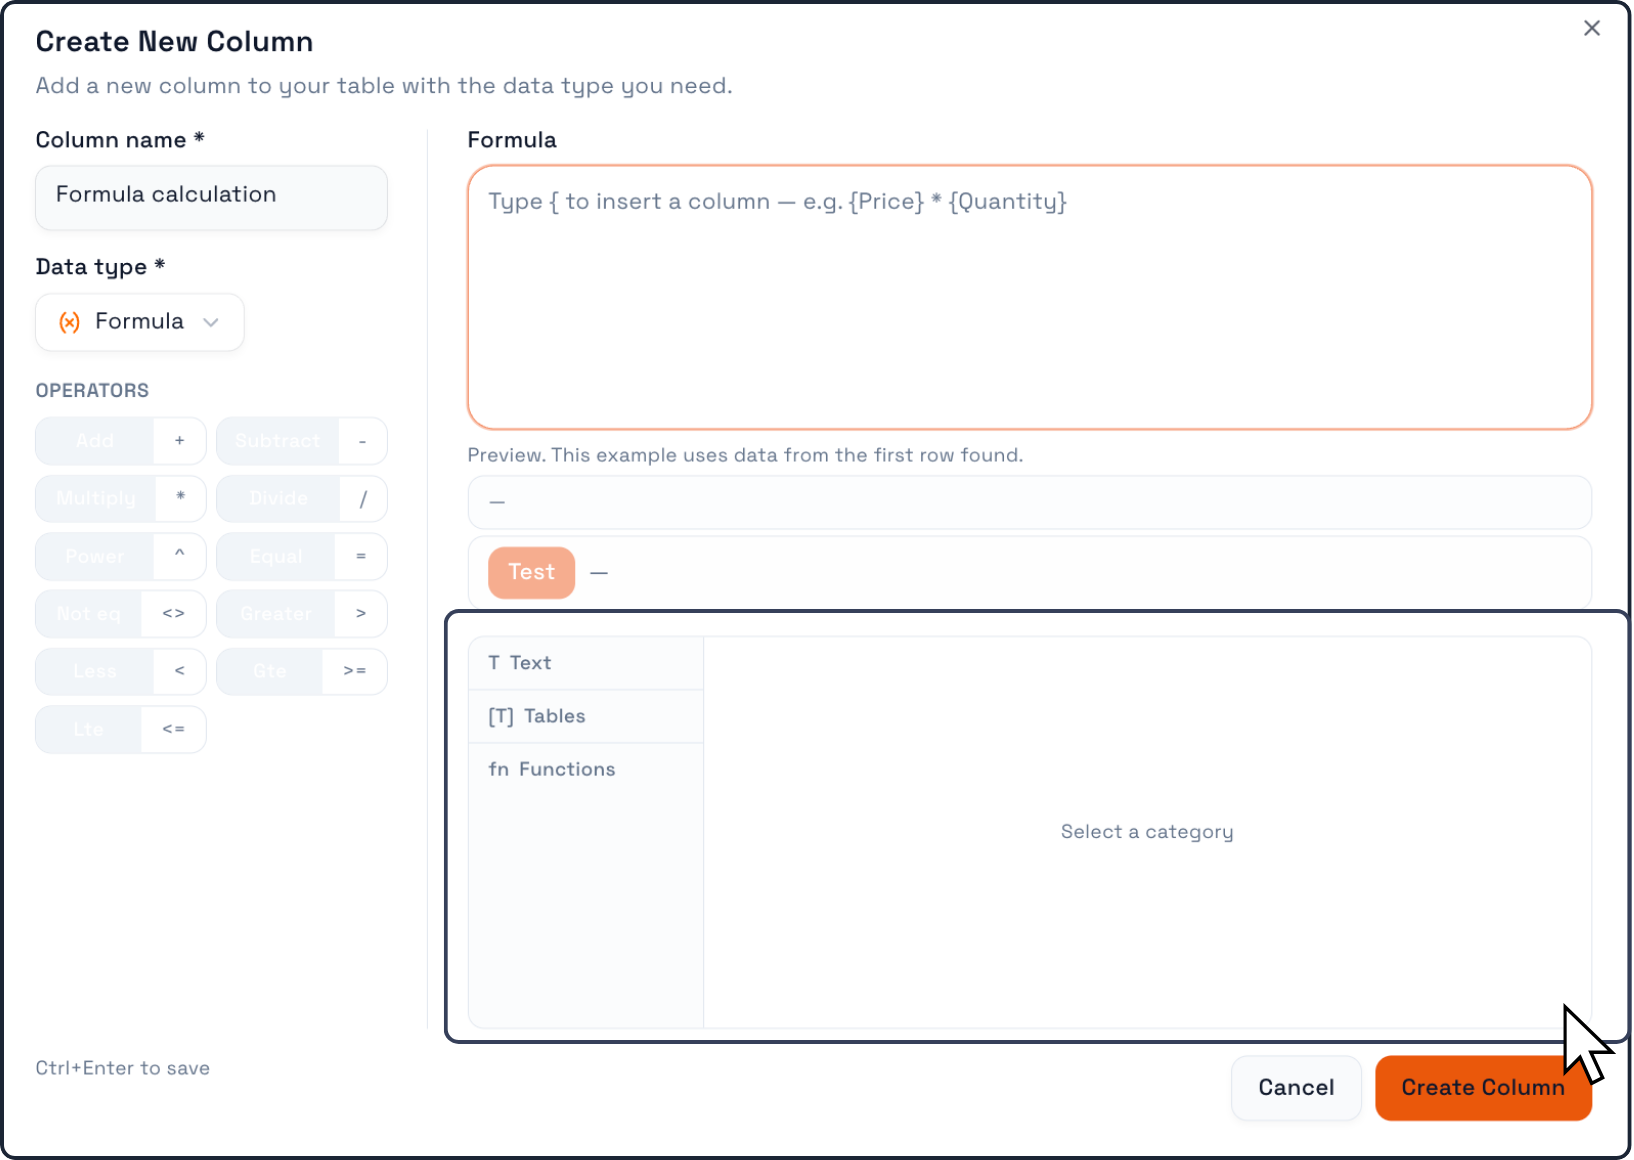
Below the preview area, the editor includes categories such as:
Text
Tables
Functions
These sections help you insert supported references and formula elements without having to write everything manually.
Step 7: Test the formula preview
Praxsuite shows a Preview area using data from the first row found in the table.
This is useful because it lets you check whether the formula is behaving as expected before saving the column.
The Test button allows you to validate the current expression and review the output.
This helps catch mistakes early, especially in more complex formulas.
Step 8: Create the column
Once the name and formula are ready, click Create Column.
Praxsuite will add the new formula column to the existing table.
From that point on, the system will calculate its value automatically for each record using the logic you defined.
Step 9: Review the result inside the table
After the column is created, it becomes part of the table structure like any other field.
The difference is that its values are not typed manually. They are generated automatically based on the formula.
This means the column stays updated as the underlying data changes.
Key things to remember
Formula columns are created from Create Column
You must select Formula as the data type
Formulas use existing table columns as inputs
The preview helps validate the result before saving
Once created, the formula column updates automatically as data changes