Setting your Outlook Account on Praxsuite mailing
Camila Escobar · June 17, 2026
Learn how to configure a mailing account in Praxsuite by connecting providers like Microsoft Outlook or SendGrid. Follow a step-by-step guide to enable email sending, manage providers, and set a primary mailing account for your workspace.
Published
Praxsuite allows you to connect a mailing provider to your Workspace so you can send emails directly from the platform. This is the first step required before using email-based workflows, alerts, or outbound communication features.
This guide explains how to configure a mailing account in Praxsuite using the Mailing Engine settings.
Step 1: Open Workspace Settings
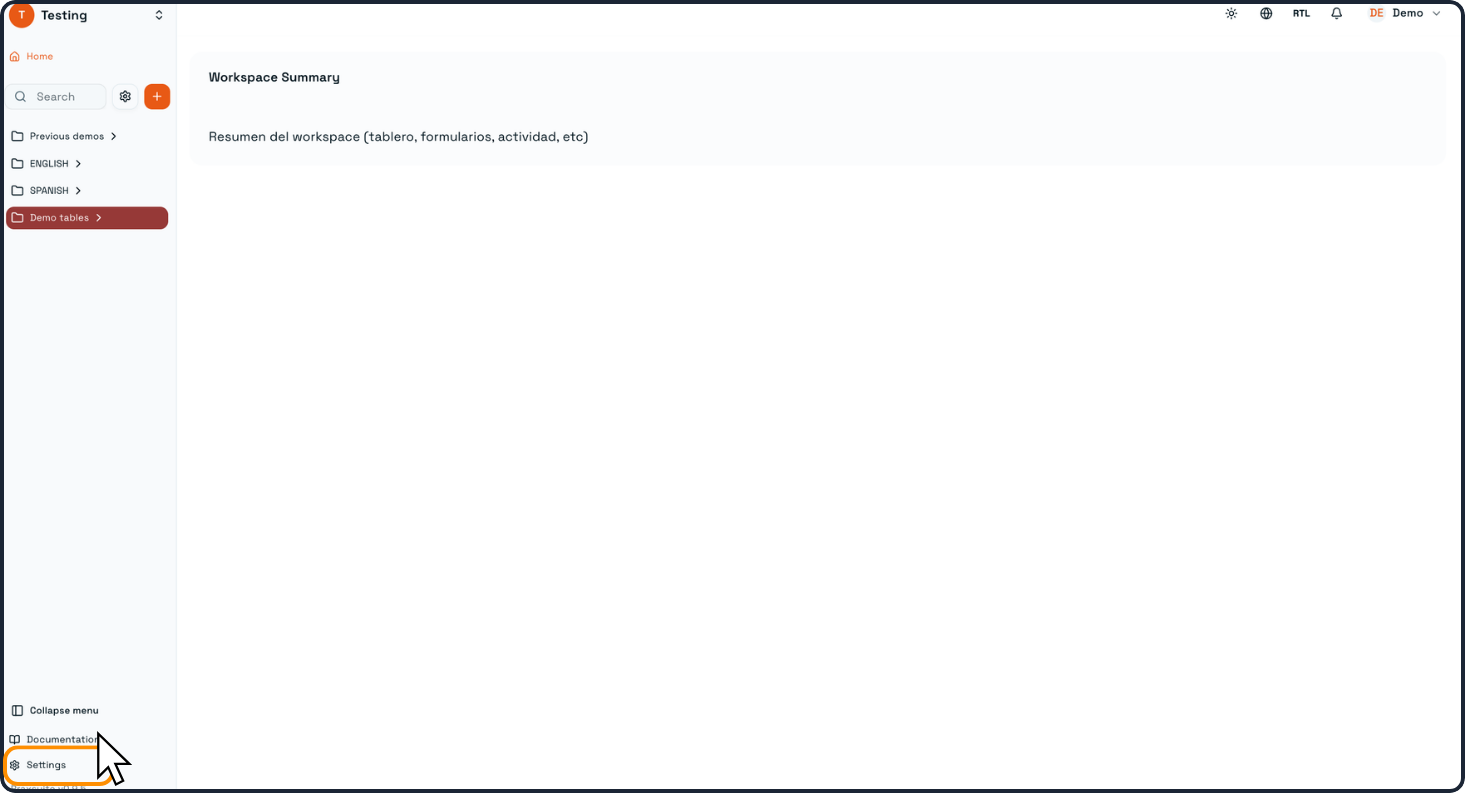
From the main Workspace view, open Settings from the left navigation menu.
This will take you to the Workspace Settings page, where administrative and integration options are managed.
Step 2: Go to the Mailing Engine tab
Inside Workspace Settings, click the Mailing Engine tab.
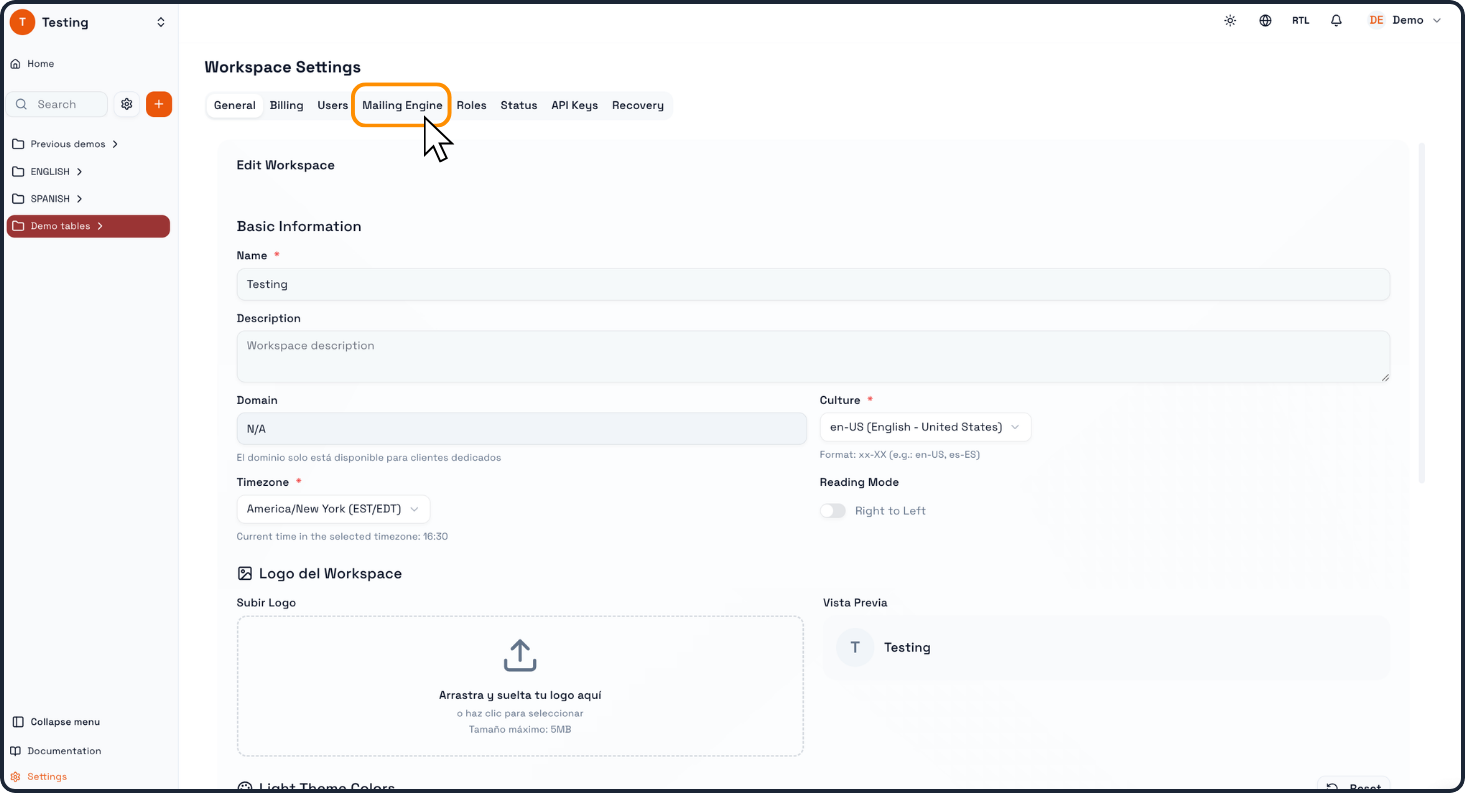
This section is where Praxsuite manages connected email providers and sender configurations.
You will see the available providers listed on the left side. In this example, the available options include:
SendGrid
Microsoft
In this Documentation we will cover the Microsoft Outlook Account setup
Step 3: Select Microsoft as your Mailing Provider

Praxsuite will display the provider configuration panel on the right side. This panel includes:
Sender name
Mail label
Linked emails
Operational state
Provider-specific connection options
At this stage, the provider will appear as Not configured until the connection is completed.
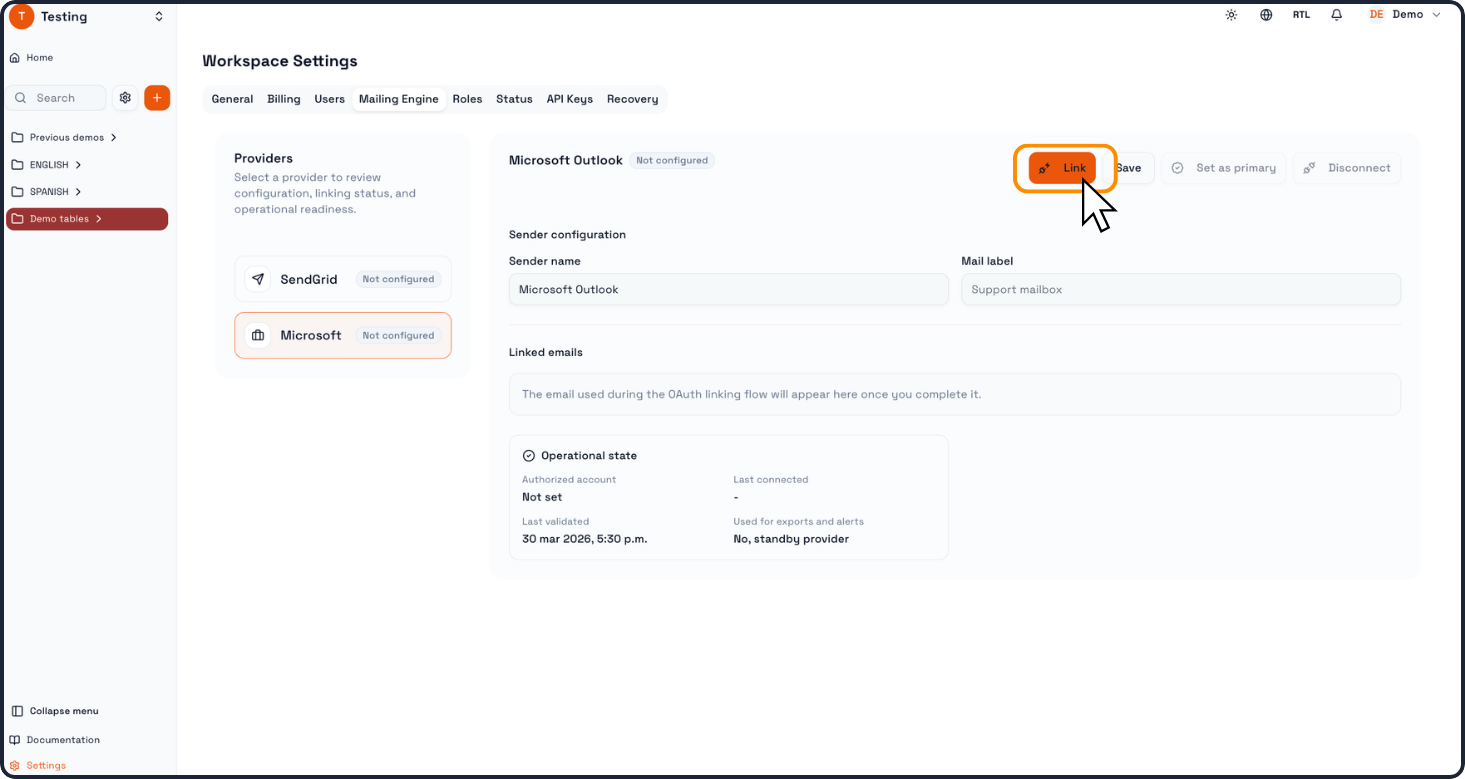
Step 4: Review the sender configuration
Before connecting the provider, review the sender configuration fields.
Typical fields include:
Sender name
The display name that will represent the sender inside Praxsuite.
Mail label
An internal label to identify the mailbox or purpose of the provider.
For Microsoft, the linked email will appear after the OAuth linking process is completed.
Step 5: Start the connection process
In this step, the user begins the authorization or connection flow required to validate the mailbox.
Step 6: Complete the provider authorization
If you are connecting Microsoft Outlook, Praxsuite will redirect you to the Microsoft authorization flow.
During this process, you may see:
An account picker screen to choose which Microsoft account to connect
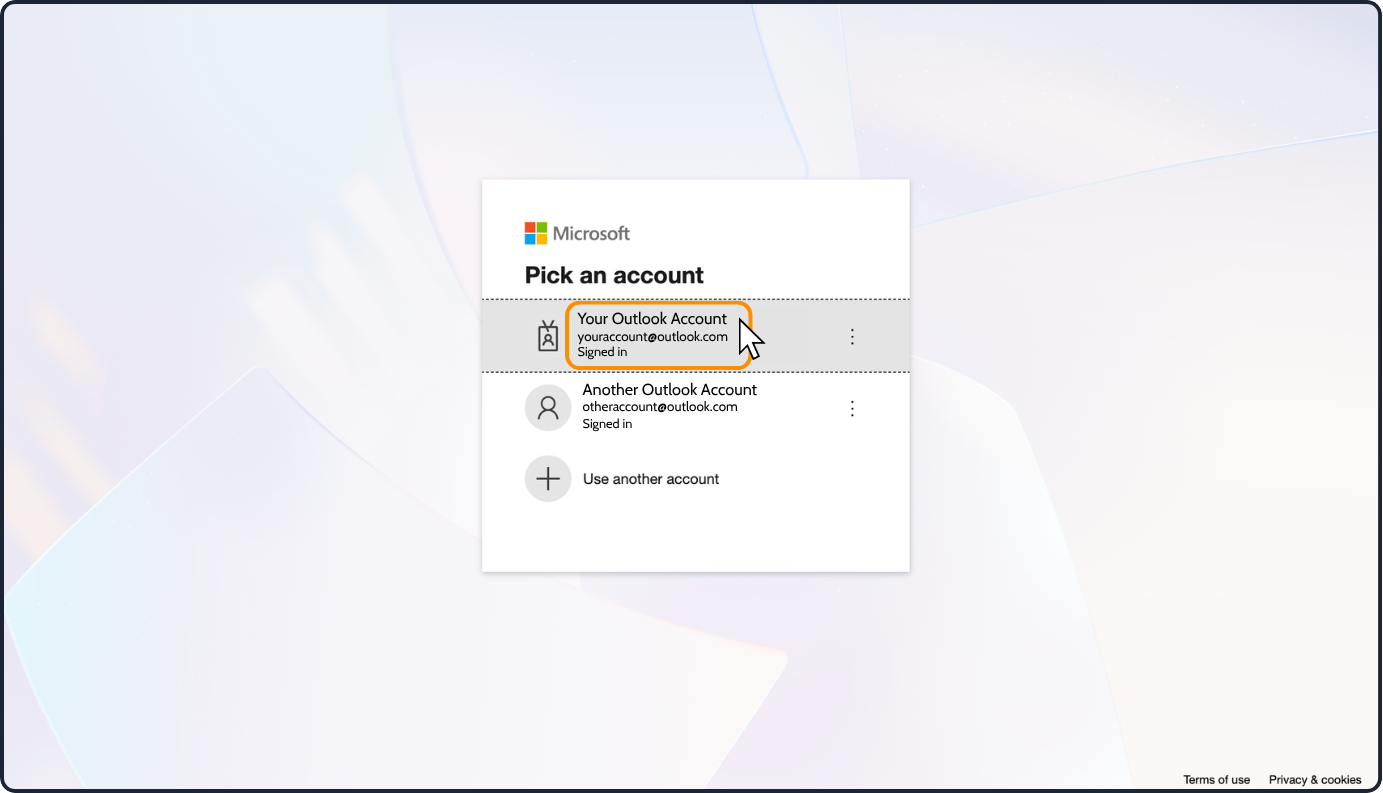
A permissions screen requesting authorization for Praxsuite Mailing
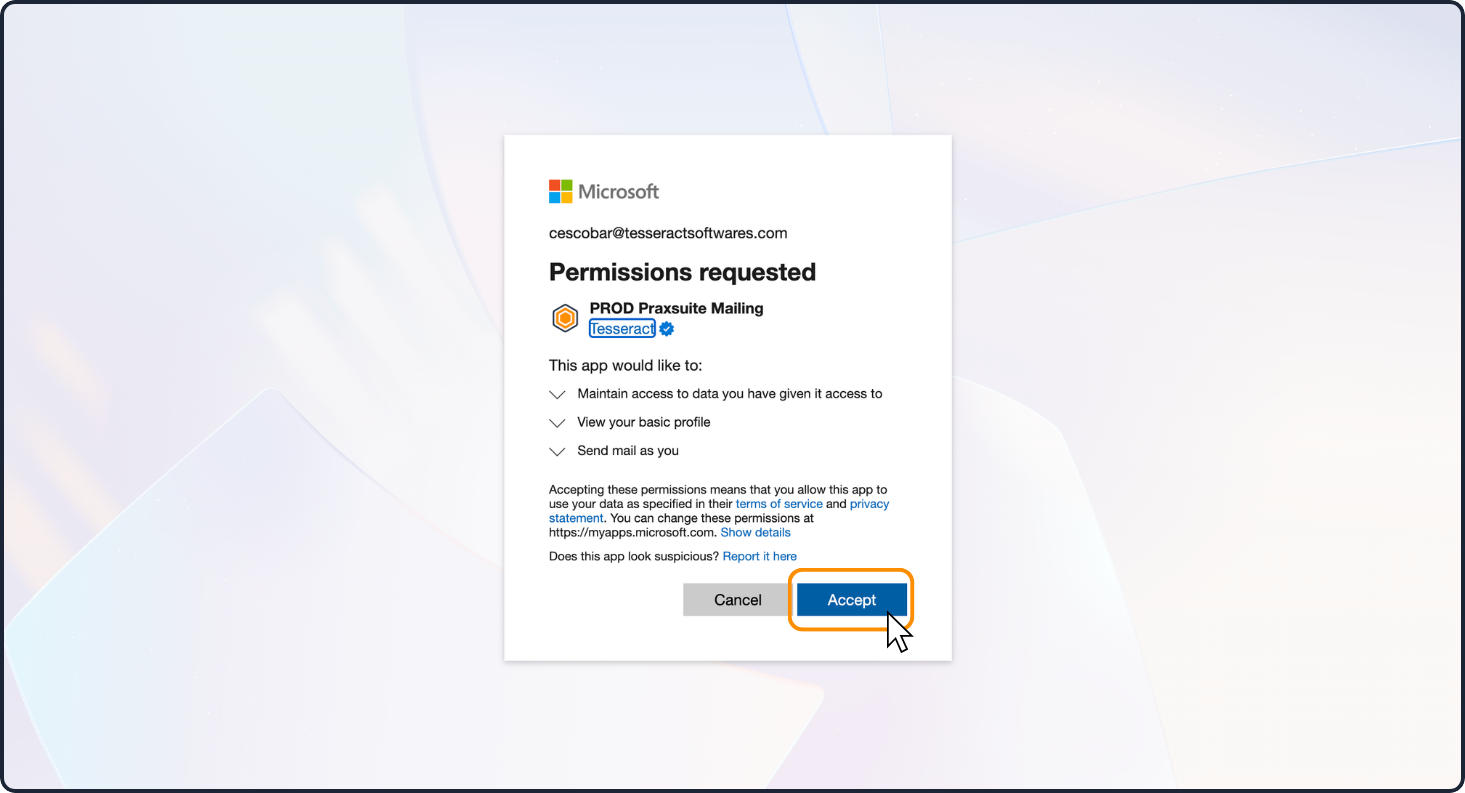
You must approve the requested permissions so Praxsuite can use the account for outbound email operations.
Typical permissions may include:
Maintaining access to the account
Viewing basic profile information
Sending mail on your behalf
Once accepted, the authorization flow returns to Praxsuite.
Step 7: Confirm the linked account in Praxsuite
After the authorization is completed, return to the Mailing Engine section.
The provider should now display updated information such as:
Configured or Primary status
The linked email address
Last connected timestamp
Last validated timestamp
Operational usage status
At this point, the mailbox is successfully connected to the Workspace.
Step 8: Set the provider as primary (if needed)
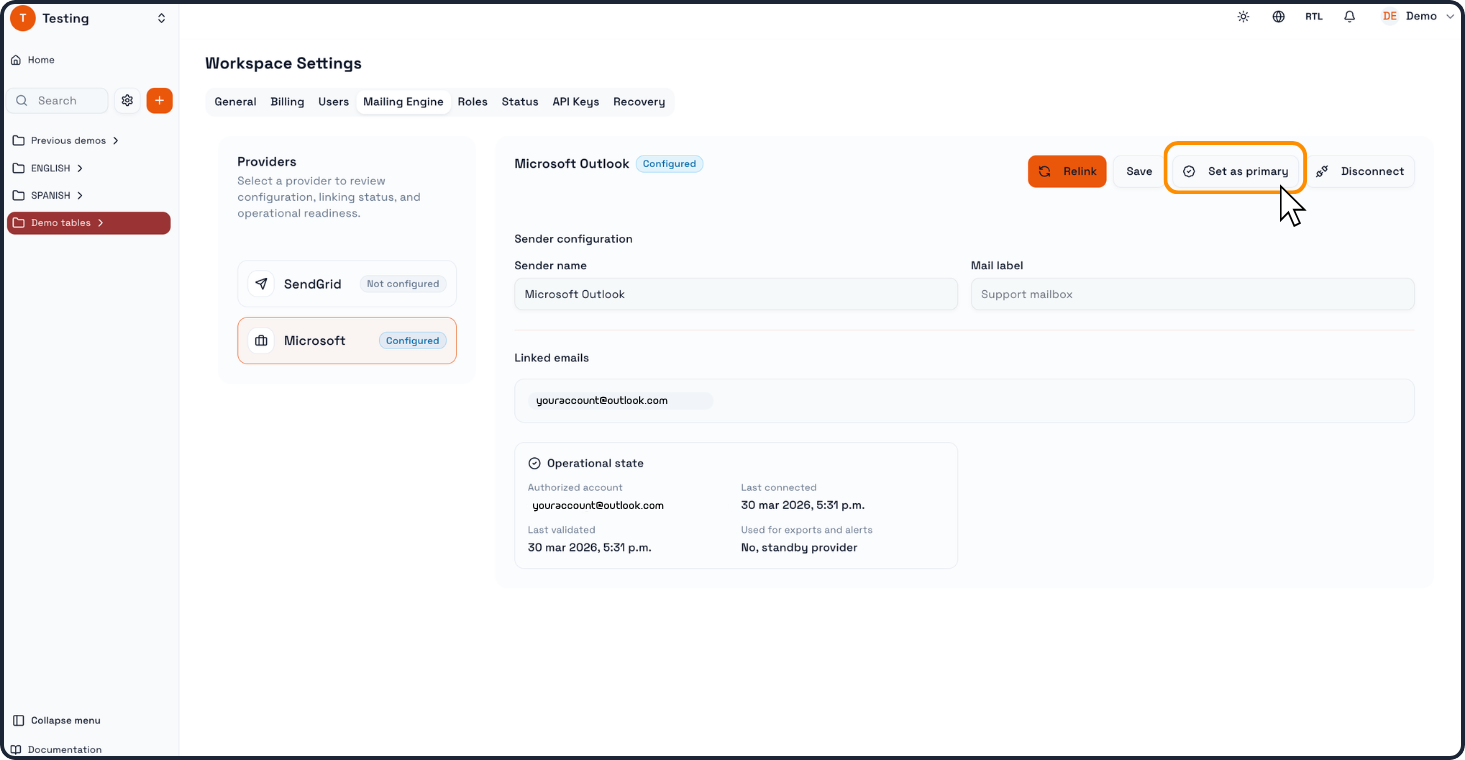
If the provider is configured but not yet the primary sender, click Set as primary.
Praxsuite will show a confirmation dialog asking whether you want to make this provider the primary email account for the Workspace.
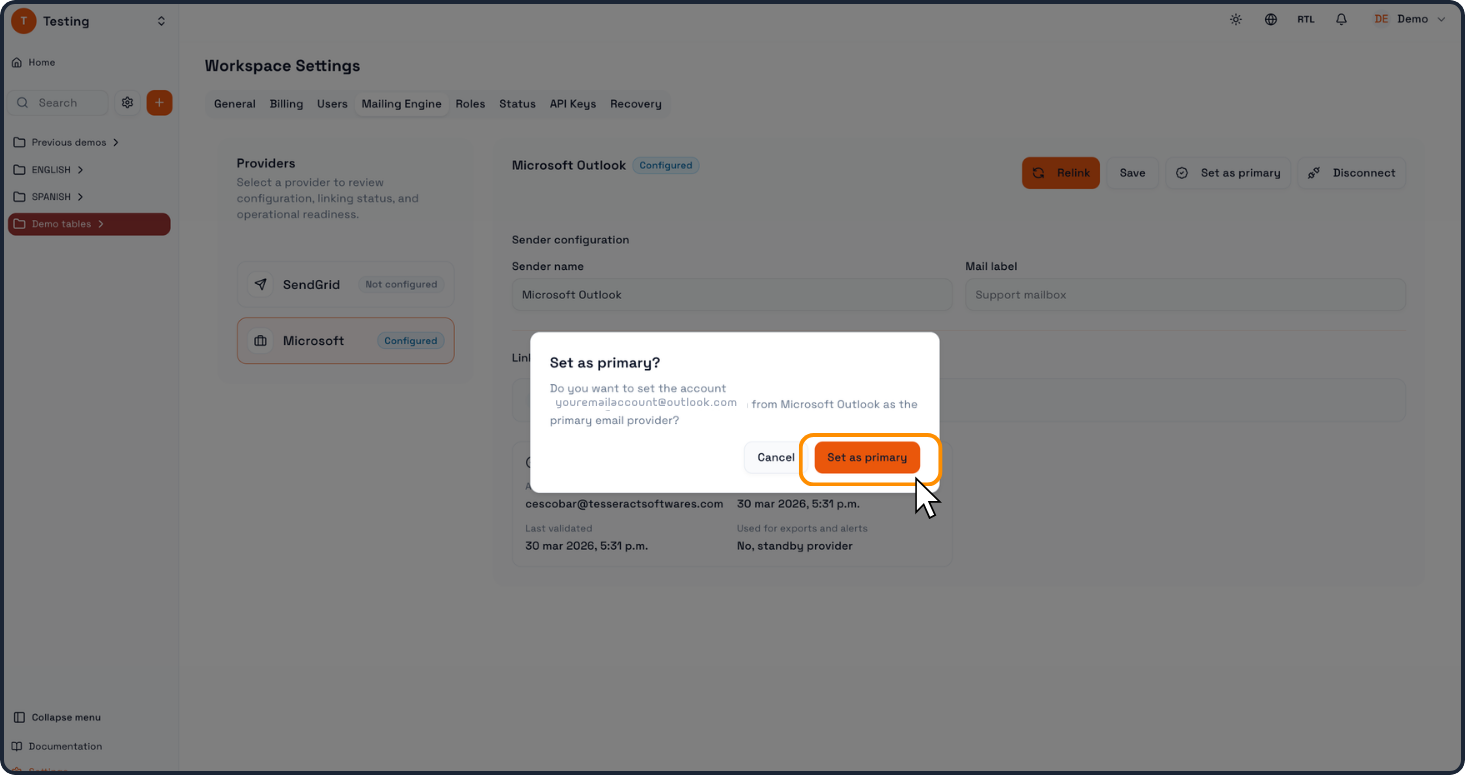
Confirm the action to proceed.
Once completed, the provider will be marked as the active primary mailing account.
Step 9: Save the configuration
If any editable fields were modified, click Save to persist the configuration.
This ensures the sender settings and provider configuration remain available for future use.
Key things to remember
Mailing providers are configured from Workspace Settings > Mailing Engine
A provider must be connected and validated before it can be used
Microsoft uses an OAuth authorization flow
The provider can be marked as primary for exports, alerts, and outbound email usage
We invite you to watch this success case video where we automated the sending of sales campaigns using Praxsuite as a CRM. Click here to watch